Hello there! When I opened our Craft & Hobby Newsletter for October, I immediately fell in love with the photo of the Decorative Pumpkin Roll and decided that I would try to make it for my son’s first birthday party in mid-October. Here is my baking journey and some tips and tricks from a not-seasoned baker who likes to dabble in baking.
This is Craft & Hobby's finished product. Keep reading to judge how I measured up!
How long did this take me to make from start to finish? The entirety of Hocus Pocus and most of The Nightmare Before Christmas, with a lunch break where I picked up on Death Becomes Her in the middle! In reality, I started around 10:30am and ended around 1:30pm with one quick laundry break near the start, and then a lunch break toward the end.
The video that is linked in the Craft & Hobby article was super helpful, so I would recommend watching that if you want to see the real pro. She was very helpful and had lots of tips sprinkled throughout. I let the video play while I baked so that I didn’t miss anything. Simply click this link to head to our Research & Learn page, then click on Craft & Hobby. Once there, enter in your Commerce Township Community Library card number. Search for "Decorative Pumpkin Roll" to find the recipe and the video. Want to watch just the video and skip the recipe? Head here!
First things first, I had to go out and buy a jelly roll pan for this recipe! I could have lived with a pan that I already owned which had sides that would have been high enough, but I wanted to make sure my pan size was big enough to fit my stencils, so I gave in and purchased the right type of pan. I found mine at Meijer but it seems common enough to find anywhere with a baking section.
Once all of my ingredients were gathered and the kids were out of the house, I got down to business! First, I lined my pan with parchment paper and used Crisco to slick it down. You don’t need a lot, and I simply used a clean hand to spread it out. Make sure to really get in those corners. This process got my paper to stay down against the pan pretty well, which is important for the stenciling process. Make sure your parchment paper is extra long and sticks out over the sides!

My jelly roll pan covered in parchment paper, greased down with shortening.
Then it was time to make our Pattern Batter! This is used for any of the stenciling you decide to use, and to sort of coat the top of the roll, beneath your stenciling, to make the color stand out. In the video she uses white for the base, and black for the lettering. I only had my basic colors on hand, so I used the batter color for the base (slightly darker than white in the finished product) and purple for the lettering. Following the recipe on this part was very easy, and I did not end up using a piping bag. Once I divided the batter up and created two colors (one orange, and one purple), I just used a spatula to carefully spread it, which we will get to below.
I laid my stencils out on extra parchment paper and greased them up with Crisco. I was generous but made sure not to have any clumps left when I was done. Make sure to do this on the side you will be applying your Pumpkin Batter. Place your stencils on the parchment paper upside down to how you want them. If you peel the stencil back and look at it, it should look how you want it to come out on the roll. I’ve included a photo of mine so you can see that the lettering looks wrong while you fill in the batter. The shortening that I applied was the side of the stencils that is facing up.

My stencils with the Pumpkin Batter applied. I moved the pumpkins to the other side of the lettering and repeated.
Now it’s time to spread the Pattern Batter on your stencils! Like I said, I carefully plonked some batter down on the stencil and spread it. A tip that she gives in the video is to ONLY go in ONE direction, and this was important. This helps keep the batter from spreading underneath your stencil and coming out the wrong shape in the end. I did my pumpkins first, then the lettering, then moved my pumpkins to the other side of the lettering for another batch. I had to cut down my stencils to make them fit, and wasn’t able to use the lettering that I originally wanted because it was just too big. My advice: check the measurements on your lettering before buying! Mine came from online, so I might go to a craft or hobby store to purchase in person next time so that I can measure. The link provided in the Craft & Hobby article linked me to stencils that were sold out, but I was able to look at similar designs and find one that I liked.
Once you’re done, gently lift your stencil like you’re peeling a bandaid. Viola! You should see your pattern on the parchment paper. Pop that beauty in the freezer and move onto the next step. At this point, did I dump the excess Pattern Batter into the garbage, forgetting that I had removed the trash can from its base to make things easier on myself and have it closer to hand? Yes. Did I then spend 5 minutes trying to clean out the Pattern Batter of the probably-never-cleaned-before trash can base because I hit it in the worst spot possible and was trying to get every nook and cranny? Also yes. But then I washed my hands (very well), and moved on.

My jelly roll once the stencils were removed. Place in freezer for 10-15 minutes.
A note about this recipe, I had SO MANY dishes by the end of this. You will use a lot of bowls in the process, and I also used a ton of spoons/mixing utensils/spatulas.
On to our Pumpkin Batter! Again, the recipe was pretty straightforward for this, and the video had some good tips if you’d like to check it out. I’m a pretty unsure-of-myself baker despite enjoying baking, so it felt good to watch the video as I was doing each step just to make sure I couldn’t add the flour the wrong way or misunderstand what “egg whites” meant.
Once your batter is made, you can take the tray back out of the freezer. In the video, she mentioned only needing 10-15 minutes in the freezer. I took mine out and gently tapped a few spots, and since nothing came away on my finger, I decided it was okay. In the end it looked like my batter may have bled just the tiniest bit, so I may do it slightly longer than 15 minutes next time.
Next, paint the remaining Pattern Batter over your stenciled area. This is the either white batter that you dyed, or the slightly off white, pumpkin-ish colored batter that you did not dye. I was gentle and started with the lettering stencil area, and then moved onto the pumpkins and spread it out toward the other end.
Next, pour your Pumpkin Batter onto the tray and once you have it spread out, tap the tray on the counter a few times to get the bubbles to surface.
 Pumpkin Batter spread over the stenciled area and the rest of the white Pattern Batter.
Did you preheat the oven? I swear, every recipe tells me to preheat the oven at the very beginning, but then it takes me FOREVER to get to the oven part! Hopefully you’ve read this before actually starting the recipe and can decide for yourself when to turn your oven on. This is the part when you need it! Preheat to 350 and stick the roll in for 10-14 minutes. In my oven it ended up being 14 minutes, but I checked starting at 10 minutes.
Once your cake is ready (the video specifies being able to poke it without leaving a fingerprint!) you can pull it out and have your supplies ready to flip. She mentioned having flour towels or tea towels on hand, plus a cooling rack. Take the roll out and immediately pull it out of the pan using the parchment paper. Lay a piece of parchment paper over the roll, along with your cooling rack, and flip your roll. I’m pretty sure the cooling rack is for stabilizing purposes, so if you use something else, no big deal! Gently pull the old parchment paper off of your roll, and you should see your decoration! Yay!!

Pre-flip

Post-Flip, Pre-Second-Flip
Next, lay your tea towel over the roll. She mentions that you can use flour to sprinkle on top, but she didn’t, so neither did I and I did not have any issues. (Sidenote: a patron mentioned to me that using raw flour can cause some health issues! Check out this FDA page on the topic and make your informed decision on this step.) Make a note of which end is your “top” end (in other words, which end do you want to be facing up at the end of the roll?). Flip again! Pull of your parchment paper. Taking your tea towel in hand, start at your “bottom” end (where your decoration is not), and start to roll your … roll! Mine started to break at this point, so I’m wondering if I rolled it too tight. It ended up not being an issue since this was the inside of the roll, and it did not split all the way across anywhere, but just keep that in mind. Roll it up, letting the tea towel take the temporary place of your filling, and set aside.

You can see my “Hello Pumpkin” decoration through the towel!
At this point I took a break to eat some lunch and fold some laundry. Once the cake was cool to the touch through the towel, I made my filling: Pumpkin Mousse!
I followed the recipe provided and had no issues. I’m not sure if I’ve ever whipped heavy whipping cream, but I started by hand and pretty quickly worried that I had done something wrong and would need to run to the store. Worry not! I grabbed my hand mixer and started whipping again, and after a few minutes it started to harden up. Don’t forget to save a tablespoon of your pudding mix to add to this heavy whipping cream to help stabilize it. Once your whipping cream has “hard points” and is solid, it’s ready to add to the rest of the Mousse.

This required an electric hand mixer for at least 5 minutes.
Making sure your cake is cool, unwrap your cake. Spread your Mousse (or other filling) along the entire cake. I wish I had put on a thicker layer than I did. Not only did I have a TON left over, my roll looked kind of sad from the side. In my opinion, fill it with more rather than less! Once you’re ready, you’ll roll your cake back up into a roll. I was not careful and ended up getting Mousse all over my cake, so just be mindful of this step.

Rolled back up with the Pumpkin Mousse inside!
Roll your cake, starting at the “bottom” end. Watch your tea towel, because I had Mousse all over it by the end and was getting it on my finished roll where I didn’t want it!
And that’s it! I wrapped mine in saran wrap and then in tinfoil, and stuck it in the freezer for 5 days until Chuck’s birthday party. I pulled it out the day before the party and moved it to the refrigerator to thaw (after a stern warning to my husband not to touch it!). I had also saved the leftover Pumpkin Mousse so people could add a scoop to their plate if they so desired. My 3 year old saw it in the fridge and asked for the “applesauce”, but I was able to dissuade her.
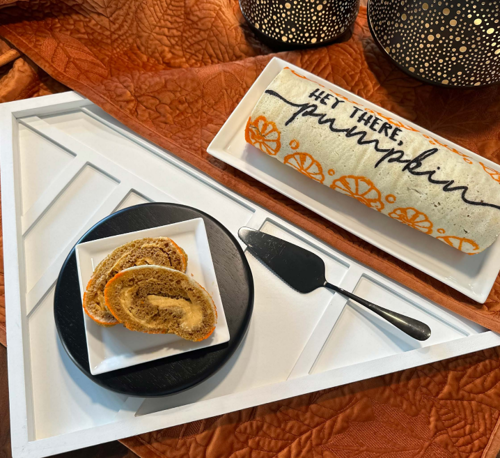
And here it is on the big day! People were hesitant to cut in, so I cut the first piece and got the ball rolling. It ended up being delicious if not exactly like the original photo. You could use any stencils you like and make this for any fall celebration!

Hello (Delicious) Pumpkin!
Want to log into Craft & Hobby so you can peruse recipes, woodworking tutorials, sewing classes, art of all kinds, and more? Have your Library Card number handy, and then head here: https://commercetwp.com/library/research-learn/
Want to sign up for our monthly Craft & Hobby Newsletter so you get tips and tricks straight to your inbox? Sign up here: https://commercetwp.com/library/about-us/newsletters/